A context menu (also called contextual or shortcut menus) is a menu that appears following some user interaction, usually as a right mouse click operation. In Microsoft Office, a context menu offers a limited set of choices that are available in the current state, or context, of an application. Usually the available choices are actions related to the selected object such as a cell or a column.
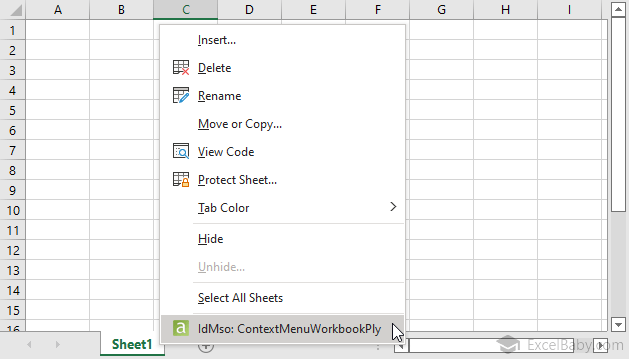
In Microsoft Excel, the most common context menu that people use is the Cell context menu. This is the menu that you see when you right-click a worksheet cell or selection of cells. However, there are many other context menus that you can customize as well. For example, the Row and Column context menus that are displayed when you right-click the row or column headers.
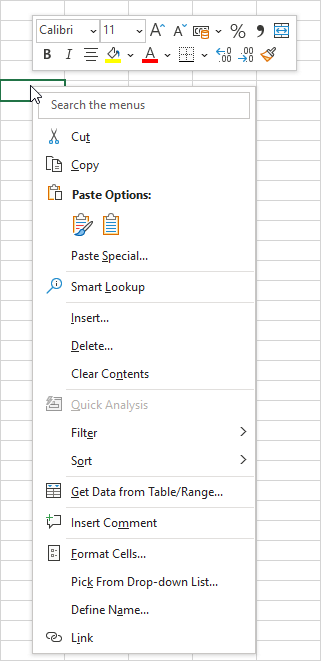
Cell context menu in Microsoft Excel 2021
The only way to customize context menus in Excel 97 through Excel 2007 is to use VBA and the CommandBars object. In Excel 2010 and later, you can also change a context menu with RibbonX.
One of the advantages of using RibbonX in Excel 2010 and later to customize context menus is that you can add controls that you cannot add by using VBA.
Root Namespace
The contextMenus element is only available in Office 2010 Custom UI Part and stored in customUI14.xml.
<customUI xmlns="http://schemas.microsoft.com/office/2009/07/customui">XML markup
The backstage Element uses the following XML markup:
<contextMenus>
	<!-- your ribbon controls here -->
</contextMenus>
Children Elements
The following list shows the controls that you can add to context menus.
Adding Controls to the Cell Context Menu by Using VBA
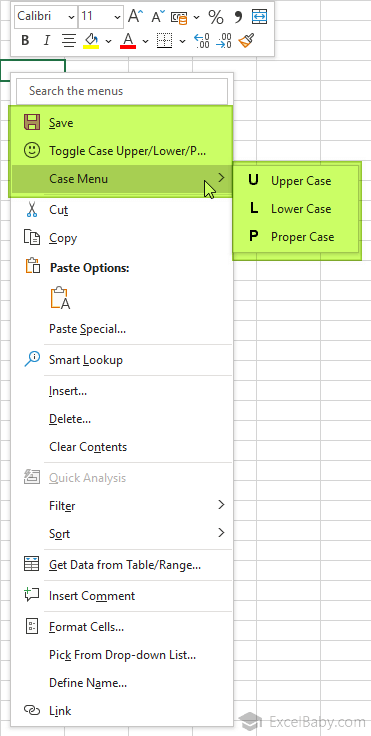
The following example adds a custom button, built-in button (Save) and a submenu on top of the Cell context menu.
There are two Cell context menus in Microsoft Excel, One is the standard menu and the second one you see when you are in page break preview mode. Page break preview mode shows you what data appears on each page and enables you to quickly adjust the print area and page breaks. To activate page break preview mode, on the ribbon, click View, and then click Page Break Preview. If you want to change the second type of menu then use the following statement.
Set ContextMenu = Application.CommandBars(Application.CommandBars("Cell").Index + 3)This information also applies to the Row and Column context menus.
The first macro adds the controls to the Cell context menu.
The second macro deletes the controls from the Cell context menu.
The third macro run when you click the button or one of the three options in the submenu. In this example, the third macro change the case of any text in a cell.
The Cell context menu looks like the menu shown in the figure below (Green highlight, Excel 2021).
Paste or type the following three subroutines into a normal module.
''------------------ Modules ------------------
''--------------- ExcelBaby.com ---------------
Sub AddToCellMenu()
    Dim ContextMenu As CommandBar
    Dim MySubMenu As CommandBarControl

    'Delete the controls first to avoid duplicates
    Call DeleteFromCellMenu

    'Set ContextMenu to the Cell menu
    Set ContextMenu = Application.CommandBars("Cell")

    'Add one built-in button(Save = 3)to the cell menu
    ContextMenu.Controls.Add Type:=msoControlButton, ID:=3, before:=1

    'Add one custom button to the Cell menu
    With ContextMenu.Controls.Add(Type:=msoControlButton, before:=2)
        .OnAction = "'" & ThisWorkbook.Name & "'!" & "ShareAction"
        .FaceId = 59
        .Caption = "Toggle Case Upper/Lower/Proper"
        .Tag = "My_Cell_Toggle_Tag"
    End With

    'Add custom menu with three buttons
    Set MySubMenu = ContextMenu.Controls.Add(Type:=msoControlPopup, before:=3)

    With MySubMenu
        .Caption = "Case Menu"
        .Tag = "My_Cell_Case_Tag"

        With .Controls.Add(Type:=msoControlButton)
            .OnAction = "'" & ThisWorkbook.Name & "'!" & "ShareAction"
            .FaceId = 100
            .Caption = "Upper Case"
            .Tag = "Upper Case"
        End With
        With .Controls.Add(Type:=msoControlButton)
            .OnAction = "'" & ThisWorkbook.Name & "'!" & "ShareAction"
            .FaceId = 91
            .Caption = "Lower Case"
            .Tag = "Lower Case"
        End With
        With .Controls.Add(Type:=msoControlButton)
            .OnAction = "'" & ThisWorkbook.Name & "'!" & "ShareAction"
            .FaceId = 95
            .Caption = "Proper Case"
            .Tag = "Proper Case"
        End With

    End With

    'Add seperator to the Cell menu
    ContextMenu.Controls(4).BeginGroup = True
End Sub

Sub DeleteFromCellMenu()
    Dim ContextMenu As CommandBar
    Dim ctrl As CommandBarControl

    'Set ContextMenu to the Cell menu
    Set ContextMenu = Application.CommandBars("Cell")

    'Delete custom controls with the Tag : My_Cell_Control_Tag
    For Each ctrl In ContextMenu.Controls
        If ctrl.Tag = "My_Cell_Toggle_Tag" Or ctrl.Tag = "My_Cell_Case_Tag" Then
            ctrl.Delete
        End If
    Next ctrl

    'Delete built-in Save button
    On Error Resume Next
    ContextMenu.FindControl(ID:=3).Delete
    On Error GoTo 0
End Sub

Sub ShareAction()

    Dim cbar As CommandBarControl
    Dim CaseRange As Range
    Dim CalcMode As Long
    Dim cell As Range

    On Error Resume Next
    Set cbar = CommandBars.ActionControl
    If cbar Is Nothing Then Exit Sub

    Set CaseRange = Intersect(Selection, _
        Selection.Cells.SpecialCells(xlCellTypeConstants, xlTextValues))
    On Error GoTo 0
    If CaseRange Is Nothing Then Exit Sub

    With Application
        CalcMode = .Calculation
        .Calculation = xlCalculationManual
        .ScreenUpdating = False
        .EnableEvents = False
    End With

    For Each cell In CaseRange.Cells
        Select Case cbar.Tag
            Case "Upper Case"
                cell.Value = UCase(cell.Value)
            Case "Lower Case"
                cell.Value = LCase(cell.Value)
            Case "Proper Case"
                cell.Value = StrConv(cell.Value, vbProperCase)
            Case "My_Cell_Toggle_Tag"
                Select Case cell.Value
                    Case UCase(cell.Value): cell.Value = LCase(cell.Value)
                    Case LCase(cell.Value): cell.Value = StrConv(cell.Value, vbProperCase)
                    Case Else: cell.Value = UCase(cell.Value)
                End Select
        End Select
    Next cell

    With Application
        .ScreenUpdating = True
        .EnableEvents = True
        .Calculation = CalcMode
    End With

End Sub
Copy the following two event procedures into the ThisWorkbook module of your workbook. These events automatically add the controls to the Cell context menu when you open or activate the workbook and delete the controls when you close or deactivate the workbook.
''--------------- ThisWorkbook ----------------
''--------------- ExcelBaby.com ---------------
Private Sub Workbook_Activate()
    Call AddToCellMenu
End Sub

Private Sub Workbook_Deactivate()
    Call DeleteFromCellMenu
End Sub
Next, save, close, and reopen the workbook to see the changes in the Cell context menu.
Adding Controls to the Cell Context Menu by Using RibbonX
In the following example, you create the same buttons and submenu as with the example described previously. This time, you use RibbonX to create the controls in Excel 2010 and later. This option is not available in Excel 97 through Excel 2007.
XML
Copy and paste the following XML code into customUI14.xml. If you don't know how to do it, read this article: Creating a Custom Ribbon.
<customUI xmlns="http://schemas.microsoft.com/office/2009/07/customui">
	<contextMenus>
		<contextMenu idMso="ContextMenuCell">
			<button idMso="FileSave"
			        insertBeforeMso="Cut"/>
			<button id="btnToggle"
			        label="Toggle Case Upper/Lower/Proper"
			        insertBeforeMso="Cut"
			        onAction="ShareAction"
			        imageMso="HappyFace"/>
			<menu id="MySubMenu"
			      label="Case Menu"
			      insertBeforeMso="Cut">
				<button id="btnUpper"
				        label="Upper Case"
				        imageMso="U"
				        onAction="ShareAction"/>
				<button id="btnLower"
				        label="Lower Case"
				        imageMso="L"
				        onAction="ShareAction"/>
				<button id="btnProper"
				        label="Proper Case"
				        imageMso="P"
				        onAction="ShareAction"/>
			</menu>
			<menuSeparator id="MySeparator"
			               insertBeforeMso="Cut"/>
		</contextMenu>
	</contextMenus>
</customUI>
VBA
Copy and paste the following VBA code into a normal module:
''------------------ Modules ------------------
''--------------- ExcelBaby.com ---------------

'Callback for ShareAction
Sub ShareAction(control As IRibbonControl)

    Dim CaseRange As Range
    Dim CalcMode As Long
    Dim cell As Range

    On Error Resume Next

    Set CaseRange = Intersect(Selection, _
        Selection.Cells.SpecialCells(xlCellTypeConstants, xlTextValues))
    On Error GoTo 0
    If CaseRange Is Nothing Then Exit Sub

    With Application
        CalcMode = .Calculation
        .Calculation = xlCalculationManual
        .ScreenUpdating = False
        .EnableEvents = False
    End With

    For Each cell In CaseRange.Cells
        Select Case control.ID
            Case "btnUpper"
                cell.Value = UCase(cell.Value)
            Case "btnLower"
                cell.Value = LCase(cell.Value)
            Case "btnProper"
                cell.Value = StrConv(cell.Value, vbProperCase)
            Case "btnToggle"
                Select Case cell.Value
                    Case UCase(cell.Value): cell.Value = LCase(cell.Value)
                    Case LCase(cell.Value): cell.Value = StrConv(cell.Value, vbProperCase)
                    Case Else: cell.Value = UCase(cell.Value)
                End Select
        End Select
    Next cell

    With Application
        .ScreenUpdating = True
        .EnableEvents = True
        .Calculation = CalcMode
    End With
End Sub
Add a Custom Button to Cell Context Menu
You can insert a custom button, instead of a built-in control, that calls a macro which executes the built-in command.
The following example adds a custom button with a built-in Save command.
XML
Copy and paste the following XML code into customUI14.xml. If you don't know how to do it, read this article: Creating a Custom Ribbon.
<customUI xmlns="http://schemas.microsoft.com/office/2009/07/customui">
	<contextMenus>
		<contextMenu idMso="ContextMenuCell">
			<button id="btnFileSave"
			        label="Save"
			        insertBeforeMso="Cut"
			        onAction="btnFileSave_Click"
			        imageMso="FileSave"/>
		</contextMenu>
	</contextMenus>
</customUI>
VBA
Copy and paste the following VBA code into a normal module:
''------------------ Modules ------------------
''--------------- ExcelBaby.com ---------------

'Callback for btnFileSave onAction
Sub btnFileSave_Click(control As IRibbonControl)
    CommandBars.ExecuteMso "FileSave"
End Sub
Additionally, you can also use the ActiveWorkbook.Save method. However, by using the ExecuteMso method, you can execute any built-in control on the Microsoft Office Fluent UI.
Adding a Dynamic Menu to the Cell Context Menu
Dynamic menus point to callback procedures that create the menus at runtime. The dynamicMenu control includes the getContent attribute that points to a GetContent callback procedure.
The following is the RibbonX XML that creates a dynamic menu in the Cell context menu.
XML
Copy and paste the following XML code into customUI14.xml. If you don't know how to do it, read this article: Creating a Custom Ribbon.
<customUI xmlns="http://schemas.microsoft.com/office/2009/07/customui">
	<contextMenus>
		<contextMenu idMso="ContextMenuCell">
			<dynamicMenu id="dmnuDemo"
			             label="My Dynamic Menu"
			             imageMso="HappyFace"
			             getContent="dmnuDemo_getContent"
			             insertBeforeMso="Cut"/>
		</contextMenu>
	</contextMenus>
</customUI>
VBA
Copy and paste the following VBA code into a normal module:
''------------------ Modules ------------------
''--------------- ExcelBaby.com ---------------

'Callback for dmnuDemo getContent
Sub dmnuDemo_getContent(control As IRibbonControl, ByRef returnedVal)
    Dim xml As String
    Dim btnXML As String
    xml = "<menu xmlns=""http://schemas.microsoft.com/office/2009/07/customui"">" & _
          "<button id=""btnHelp"" imageMso=""Help"" label=""Help"" onAction=""btnHelp_click""/>" & _
          "<button id=""btnFind"" imageMso=""FindDialog"" label=""Find"" onAction=""btnFind_click""/>" & _
          "</menu>"
    returnedVal = xml
End Sub

'Callback for btn1 onAction
Sub btnHelp_click(control As IRibbonControl)
    MsgBox "Help macro"
End Sub

'Callback for btn2 onAction
Sub btnFind_click(control As IRibbonControl)
    MsgBox "Find macro"
End Sub
Enable or Disable the Control on the Cell Context Menu
The following XML disable the Delete control in the Cell context menu with RibbonX:
<customUI xmlns="http://schemas.microsoft.com/office/2009/07/customui">
	<contextMenus>
		<contextMenu idMso="ContextMenuCell">
			<button idMso="CellsDelete"
			        enabled="false"/>
		</contextMenu>
	</contextMenus>
</customUI>
As you can see in this statement, to disable a control on a context menu, you must know the control’s ID (idMso). idMSO Full List in Excel for Windows.
How to Find the Name of the Context Menu
I recommend you to use Office Context Menu Add-in.
This add-in adds a button to all context menus of Excel, Outlook, PowerPoint, Project, Publisher, Visio and Word in Office 2010 and later. The button shows the name of the context menu. Clicking the button puts the following values to the Clipboard: 1) context menu name, 2) context object type name.