Creating an Add-In
You can convert any macro-enabled workbook to an add-in or create a new add-in. To create an add-in from a macro-enabled workbook file, do the following:
Test the macro-enabled workbook
Before you convert a workbook to an add-in, test it and make sure that everything works properly. Remember that an add-in is never the active workbook, and it never displays any of its worksheets.
To test the macro, save the macro-enabled workbook, close it, and then reopen it. With the workbook open, activate a different workbook, select some cells that contain text, and then press Alt+F8 to display the Macros dialog box. Execute each macro and try all of the options.
Compile VBAProject
- Activate the VBE (ALT>+F11), and select the future add-in workbook in the Project window.
- Choose Debug > Compile VBAProject.
This step forces a compilation of the VBA code, and it also identifies any syntax errors so that you can correct them. When you save a workbook as an add-in, Excel creates the add-in even if it contains syntax errors.
Change the default project name
In VBE, Choose Tools > VBAProject Properties > General tab, then change the default project name to that of the Add-in and enter a brief description of its purpose.
By default, all VBA projects are named VBAProject. In this example, the project name is changed to HelloWorld. This step is optional but recommended.
Protect the project
In VBE, Choose Tools > VBAProject Properties > Protection tab, and select the Lock Project for Viewing check box. Then enter a password (twice), and click OK.
This step is necessary only if you want to prevent others from viewing or modifying your macros.
Microsoft has never promoted Excel as a product that creates applications in which the source code is secure. The password feature provided in Excel is sufficient to prevent casual users from accessing parts of your application that you'd like to keep hidden. Eg. SOLVER.XLAM password: Wildebeest!!. However, if you must be absolutely sure that no one ever sees your code or formulas, you can try COM Add-ins.
Add a title and description for your add-in
This step is optional, but it is highly recommended.
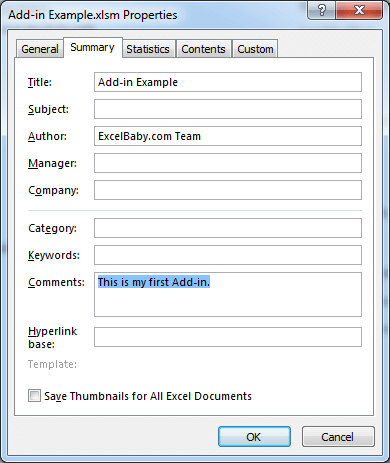
To enter a title and description for your add-in, return to Excel, choose File > Info. Enter a title, such as Add-in Example, for the add-in in the Title field. This text will appear in the list in the Add-ins dialog box.
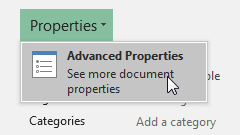
In the Comments field, enter a description of the add-in. If you don't see the Comments field, click the Properties > Advanced Properties link.
This information will appear at the bottom of the Add-ins dialog box when the add-in is selected. In this example, enter "This is my first Add-in." in the comment field.
Create the user interface for your add-in
You can create a custom ribbon for your add-in, or assign a shortcut to execute a macro. To provide a shortcut key to executes the macro do the following steps:
- In Excel, choose Developer tab > Code group > Macros (or press Alt+F8). The Macro dialog box appears.
- In the Macro Name list, select the macro which you want to assign a shortcut.
- Click the Options button. The Macro Options dialog box appears.
- In this example, we specify Ctrl+Shift+C as the shortcut key, press Shift+C and click OK.
- Click Cancel to close the Macro dialog box.
- Make sure you save the workbook after making this change.
Save the workbook as an add-in
In Excel, choose File > Save As > Browse, in the Save As dialog box, select Excel Add-In (*.xlam) from the Save as Type drop-down list. Click Save.
Excel proposes the standard Add-ins are saved at C:\Users\username\AppData\Roaming\Microsoft\Addins, but you can save the add-in to any location.
A new add-in file is created, and the original XLSM workbook remains open.
A workbook being converted to an add-in must have at least one worksheet, and a worksheet must be the active sheet when you create the add-in. If a chart sheet is active, the option to save the workbook as an add-in does not appear in the Save As dialog box.
Installing Add-ins
1. Launch Excel, then choose Developer > Add-ins group > Excel Add-ins to launch the "Add-ins" dialog box. If you don't find Developer tab, please read: Introduction to the Developer tab
Choose File > Options and select the Adds-ins item in the left-hand pane, In the Manage drop-down list at the bottom of the right-hand pane, select Excel Add-ins, then click the Go button – to launch the "Add-ins" dialog box.
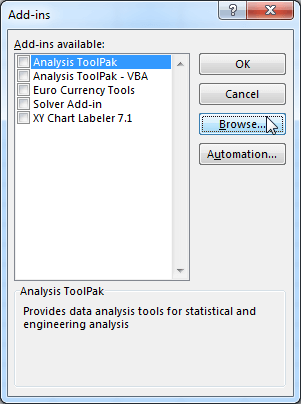
2. Click the Browse... button, then navigate to the location and double-click the Add-in that you just created.
After you find your new add-in, the Add-ins dialog box displays the add-in in its list. the Add-ins dialog box also displays the descriptive information that you provided in the Document Properties panel.
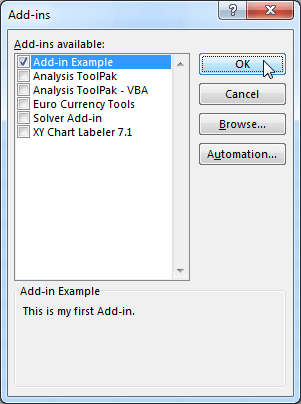
3. Click OK button to launch the Add-in.
Uninstalling Add-ins
You can uninstall an Add-in by renaming or deleting the .xlam file, then unchecking its box in the Add-ins dialog. You will then be asked if you want to delete it from the list.
Editing Add-ins
Test the add-in to make sure that it works correctly. If your add-in doesn't work, make changes to your code in the VBE, and don't forget to save your changes (save the file by choosing File > Save in the VBE). Because an add-in doesn't appear in an Excel window, you must save it from the VBE.
Converting Add-ins to XLSM workbook
If you want to view the add-in workbook in Excel, you can convert add-ins back to .xlsm workbook.
If the Add-in is loaded, do the following steps:
- Activate the VBE (ALT+F11), and select the add-in workbook in the Project window.
- Select ThisWorkbook object in the Project window.
- Press F4 to open ThisWorkbook Properties window.
- Find and set IsAddIn property to
False.
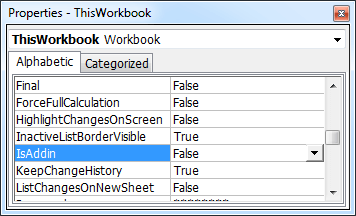
- After you make your changes, set the IsAddIn property back to
Truebefore you save the file. If you leave the IsAddIn property set to False, Excel won't let you save the file with the XLAM extension.
If you don't trust the code within and want to change .xlam file to .xlsm without opening/loading the .xlam addin then follow below steps:
- Change the .xlam file extension to .zip.
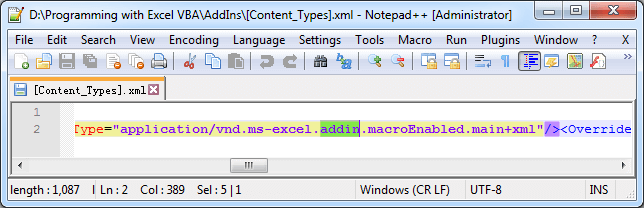
- Extract the zip file and open
[Content_Types].xmlin notepad (or any txt editor). - Find the word
addinand replace it withsheetand save the xml file.
- Replace the edited xml file in the zip folder (you can drag the
[Content_Types].xmlfile to zip file). - Change the file extension from .zip to .xlsm. Now, your workbook is ready!!
- To open the workbook without running the macro, hold the Shift Key while opening the workbook (or you may choose Disable Macros when the workbook opening).