Excel has two modes of macro recording — absolute reference and relative reference that differ in how they refer to cells in a worksheet. Macros that use absolute references always refer to the same cell location, regardless of the currently selected cell, while macros that use relative references refer to cells that are offset from the selected cell.
Absolute References
Excel’s default recording mode is in absolute reference. As you probably know, absolute references are often used for cell references in formulas. When the cell reference in the formula is absolute, it doesn't automatically adjust when the formula is pasted to a new location. In our previous example we used absolute references. Review the absolute reference example.
Relative References
Relative means relative to the currently active cell. Therefore, you should choose the active cell carefully, either when recording a relative reference macro or when running the macro.
Recording macros with relative references
In the following example we use relative references to record a macro.
- Open a blank workbook in Excel. Excel selects cell A1 by default. Before recording, make sure cell A1 is selected.
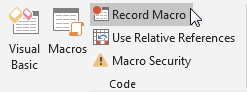
- On the Developer tab, click the Record Macro button in the Code group to launch the “Record Macro” dialog box.
- In this example, the Macro name type "RelativeExample", Store macro in This Wordbook. Click OK to start recording the macro.
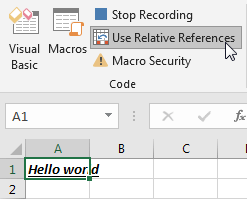
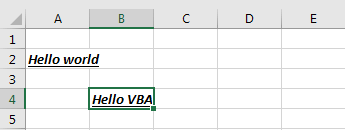
- In active cell A1, type "Hello World" and press Ctrl+Enter to accept the entry and stay in the same cell.
- Change the font format of active cell A1 to underlined, italicized, and bold.
- Click the Use Relative References icon in the Code group.
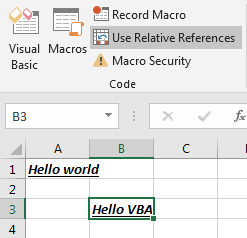
- Select cell B3, type "Hello VBA" and press Ctrl+Enter to accept the entry and stay in the same cell.
- Change the font format of active cell B3 to underlined, italicized, and bold.
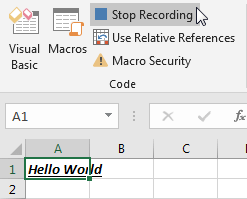
- Click the Stop Recording button in the Code group.
The macro should look something like this
Sub RelativeExample()
'
' RelativeExample Macro
'
'
    Selection.FormulaR1C1 = "Hello world"
    Selection.Font.Bold = True
    Selection.Font.Italic = True
    Selection.Font.Underline = xlUnderlineStyleSingle
    ActiveCell.Offset(2, 1).Range("A1").Select
    Selection.FormulaR1C1 = "Hello VBA"
    Selection.Font.Bold = True
    Selection.Font.Italic = True
    Selection.Font.Underline = xlUnderlineStyleSingle
End Sub
In this example, the macro using absolute reference input the text "Hello world" in the cell A1, and format the font with underlined, italicized, and bold. Then, use the relative reference to input the text "Hello VBA" in the cell B3, it is 2 rows and 1 column away from the originally selected cell (A1), and format the font with underlined, italicized, and bold.
Testing this macro
- Clear all cells. (Press Ctrl+A, then click Home > Editing group > Clear > Clear all.)
- Select cell A2 and run the macro named "RelativeExample". The result after running the macro for the first time is as follows:
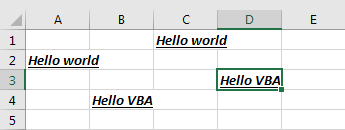
- Select cell C1 and run the macro named "RelativeExample" again. The result after running the macro a second time is as follows:
Code optimization
The optimized macro code is as follows:
Sub RelativeExample()
'
' RelativeExample Macro
'
    With Selection
        .FormulaR1C1 = "Hello World"
        With .Font
            .Bold = True
            .Italic = True
            .Underline = xlUnderlineStyleSingle
        End With
    End With
    With ActiveCell.Offset(2, 1)
        .FormulaR1C1 = "Hello VBA"
        With .Font
            .Bold = True
            .Italic = True
            .Underline = xlUnderlineStyleSingle
        End With
    End With
End Sub