In Excel, you can assign names to cells and ranges. For example, you can give a cell a name such as VAT, or you can name a range Q1Sales.
Advantages of Range Names
- A meaningful range name (such as
TotalPrice) is much easier to remember than a cell address (such asH2). - Entering a name is less error prone than entering a cell or range address, and if you type a name incorrectly in a formula, Excel will display a
#NAME?error. - You can quickly select the range using the Name box at the left end of the Formula bar, or by choose Home > Editing > Find & Select > Go To (or pressing F5 or Ctrl+G) and select the range name.
- Creating formulas is easier. You can paste a cell or range name into a formula by using Formula AutoComplete (Show a list of relevant functions and defined names when building cell formulas. Home > Excel Options > Working with formulas > Formula AutoComplete. ).
- Names make your formulas more understandable and easier to use. Learn Using Names in Excel Formulas. A formula such as
=Price*Quantityis certainly more intuitive than=F2*G2.
Range Names rules
- Starts with a letter, underscore (
_), or backslash (\). - You can use the period (
.), question mark (?), underscore (_), and backslash(\) symbols within the name, but not as the first character. - Names can be a single letter, but you cannot use the letters
R,r,Candc. - Names can't be the same as a cell address, like
B3,may12. - Names can't contain spaces.
- Names can be up to 255 characters.
To be on the safe side, avoid creating names that override Excel's internal names, such as Print_Area, Print_Titles, Consolidate_Area, and Sheet_Title.
Creating Range Names
Using the Name box
The fastest way to create a name is to use the Name box.
- Select the cell or range that you want to name.
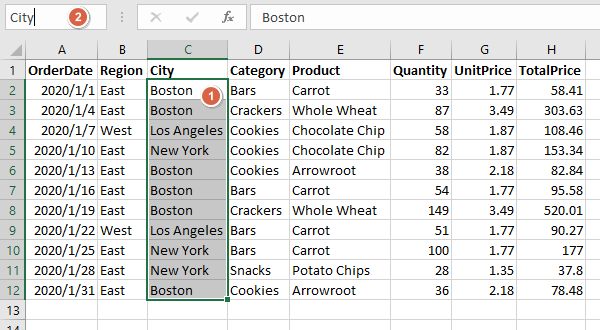
- Click the Name box.
- Type the name.
- Press Enter to create the name.
If the range you're naming contains values and has an identifying label above it or to the left, you should omit that label from your selection as a best practice. This is because including the label with the numeric values might create an error if you try to use the range name in some formulas.
Using the New Name dialog box
The New Name dialog box enables you to assign a scope when naming a range.
- Select the cell or range that you want to name. Again, it is advisable to not include any label in the range of values.
- Choose Formulas > Defined Names > Define Name.
- Excel opens the New Name dialog box.
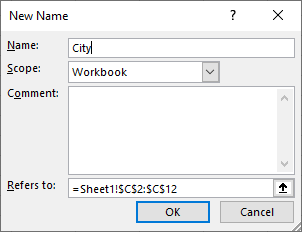
- Type a name in the Name text field.
- Optional step: Open the Scope drop‐down list and click the name of a sheet to limit the scope of the new range name to that sheet.
- Optional step: If you like, you can can add a comment to the name.
- Click Ok.
Creating multiple Range Names at once
If your data has labels on the left or above. you can create multiple Range Names at once.
-
- Select the range that you want to name. Make sure to include data labels, if any.
- Choose Formulas > Defined Names > Create from Selection or press Ctrl+Shift+F3.
- Excel opens the Create Names from Selection dialog box.
- Check or clear boxes as needed to specify which cells hold the labels to use for the range names. For example, if you only want to create names for the ranges in the selected columns, check only the Top row.
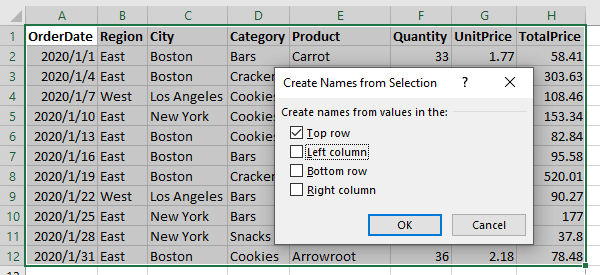
- Click Ok.
- Excel creates the names. You can check the names: Choose Formulas > Defined Names > Name Manager or press Ctrl+F3.
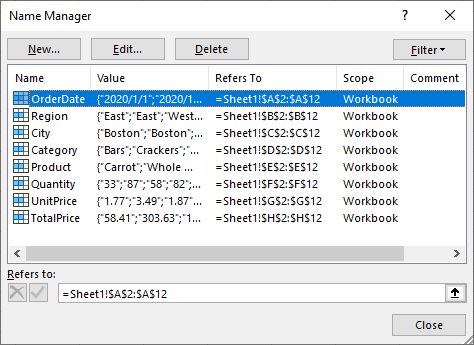
Managing Names
You can manage names with Excel Name Manager. To opens the Name Manager: Choose Formulas > Defined Names > Name Manager (or press Ctrl+F3 or press Alt+MN).
The Name Manager enables you to do any of the following:
- Display information about each name:
- Resize the Name Manager dialog box
- Widen the columns to show more information,
- Rearrange the order of the columns
- Click a column heading to sort the information by the column.
- Create new range names: Click the New button to create a new name.
- Edit range names: To edit a name, select it in the list, and then click the Edit button. You can change the name itself, modify the Refers To range, or edit the comment.
- Delete unneeded range names: To delete a name, select it in the list and click Delete.
- Filter the range names: Click the Filter button and then click any of the following filter option from its drop-down menu.
- Names Scoped to Worksheet
- Names Scoped to Workbook
- Names with Errors
- Names without Errors
- Defined Names
- Table Names
Be careful that you don’t delete a range name that is already used in formulas in the worksheet. If you do, Excel will return the #NAME? error value to any formula that refers to the name you deleted! If you find that formulas return #NAME? after you delete a name, choose Undo from the Quick Access toolbar (or press Ctrl+Z) to get the name back.
You can create a list of names in a worksheet to check the refers:
- Select a cell in an empty area of your worksheet.
- Choose Formulas > Defined Names > Use in formula > Paste Names to display the Paste Name dialog box (or press F3).
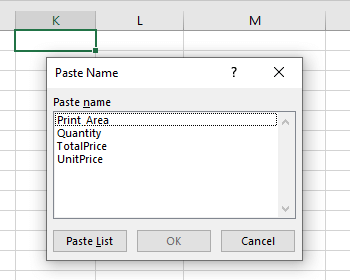
- Click the Paste List button.
- Excel creates a list of all names and their references in the workbook.