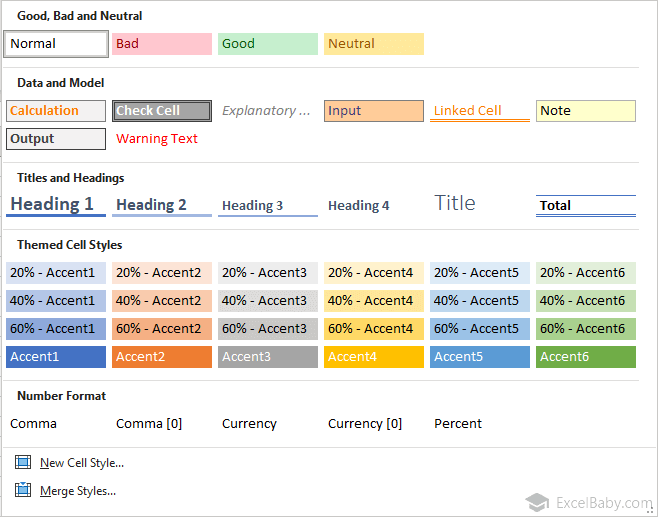
Cell styles combine a number of different formatting aspects that can include number format, text alignment, font and font size, borders, fills, and protection status. Named cell styles make it easy to apply a set of predefined formatting options to a cell or range.
Applying styles
- Select a cell or range that you want to apply styles.
- Choose Home > Styles > Cell Styles.
- Move your mouse over the style choices, the selected cell or range temporarily displays the style. When you see a style you like, click it to apply the style to the selection.
If Excel's window is wide enough, you won't see the Cell Styles command in the Ribbon. Instead, you'll see four or more formatted style boxes. Click the drop-down arrow to the right of these boxes to display all of the defined styles.

Creating new styles
You can create a custom cell style to quickly format your worksheet:
- Select a cell, and apply all the formatting that you want to include in the new style.
- Choose Home > Styles > Cell Styles > New Cell Style.
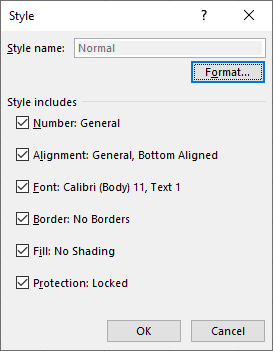
- Excel displays a Style dialog based on the current cell format, along with a suggested name for that style.
- Enter a new style name in the Style Name field.
- (Optional) If you don't want the style to include one or more format categories, remove the check.
- Click OK to create the style and to close the dialog box.
- The new custom style is available when you choose Home > Styles > Cell Styles.
Custom styles are available only in the workbook in which they were created.
Modifying an existing style
By default, all cells use the Normal style. If you modify the Normal style, all cells that haven't been assigned a different style will reflect the new formatting.
Here is a quick example of how you can use cell styles to change the default font style used in the current workbook:
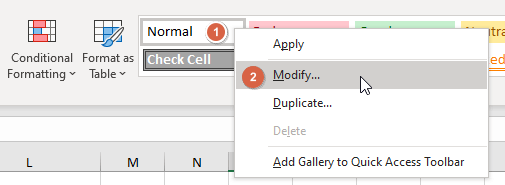
- Choose Home > Styles > Cell Styles. Excels displays the list of styles for the active workbook.
- Right-click Normal and choose Modify. Excel opens the Style dialog box, with the current settings for the Normal style.
- Click the Format button. Excel displays the Format Cells dialog box.
- Click the Font tab, and choose the font and size that you want as the default.
- Click OK to return to the Style dialog box. Notice that the Font item displays the font choice you made.
- Click OK again to close the Style dialog box.
- The font for all cells that use the Normal style changes to the font that you specified.
Merging styles from other workbooks
Custom styles are available only in the workbook in which they were created. If you want to use it in another workbook, you can merge these styles from the workbook you created before.
- Open the workbook that contains the styles that you want to merge.
- Open a new workbook or an existing workbook, then choose Home > Styles > Cell Styles > Merge Styles.
- Excel displays the Merge Styles dialog box that shows a list of all open workbooks.
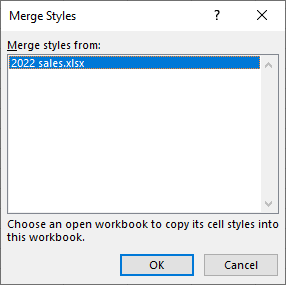
- Select the workbook that contains the styles you want to merge and click OK.
- Excel copies custom styles from the workbook that you selected into the active workbook.
You can save workbook settings that you frequently use in a workbook template, and then automatically open that workbook template every time that you create a new workbook. For more information, see Automatically open a workbook or worksheet template.