If you always add and name a new Worksheet with specific name in your Workbook, sometimes it seems very boring to do it manually. This simple macro can help you.
Add and Name a New Worksheet with Specific Name
'------------------ Modules------------------
Sub AddAndNameWithSpecificName()
'Step 1: Tell Excel what to do if Error
    On Error GoTo Error

'Step 2:  Add a new Worksheet and name it with specific name
    Sheets.Add.Name = "My New Sheet" 'add a new Worksheet and name with "My New Sheet", change the name with yours.
    Exit Sub

'Step 3: If here, an error happened; tell the user
Error:
    MsgBox "There is already a Worksheet called that."
End Sub
How This Macro Works
- If you give the new sheet a name that already exists, an error occurs. In Step 1, the macro tells Excel to immediately skip to the line that says Error (in Step 3) if there is an error.
- In Step 2, we use the Add method to add a new Worksheet. By default, the Worksheet is named Sheetxx by Excel, where xx represents the number of the Worksheet counts, eg. Sheet7, Sheet15. We use the Add method to add a new Worksheet and name with specific name "My New Sheet", you can change the name with yours.
- Step 3 notifies the user that the Worksheet name already exists.
How to Use This Macro
Most VBA code should be placed in Standard Modules unless specified.
If you see a comment '------------------ Modules------------------ in the code header that means put the code in a Standard Module. For more information, learn this course: Where should I put the Excel VBA code?
The following steps teach you how to put VBA code into a Standard Module:
- Activate the Visual Basic Editor by pressing ALT + F11.
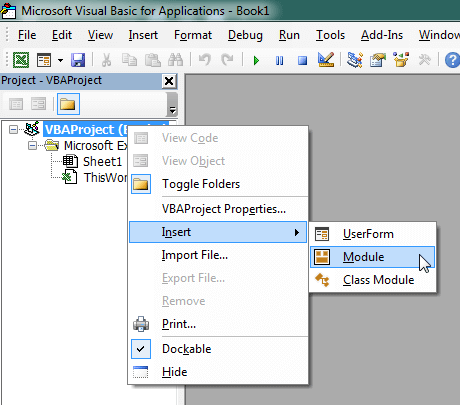
- Right-click the project/workbook name in the Project Window.
- Choose Insert -> Module.

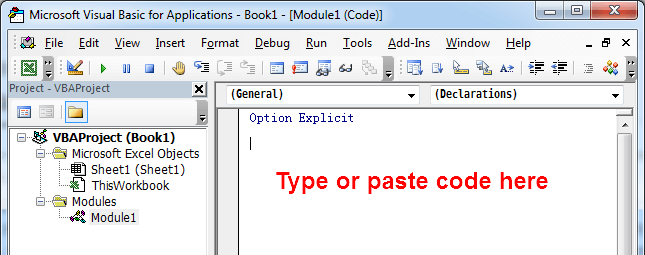
- Type or paste the code in the newly created module. You will probably need to change the sheet name, the range address, and the save location.

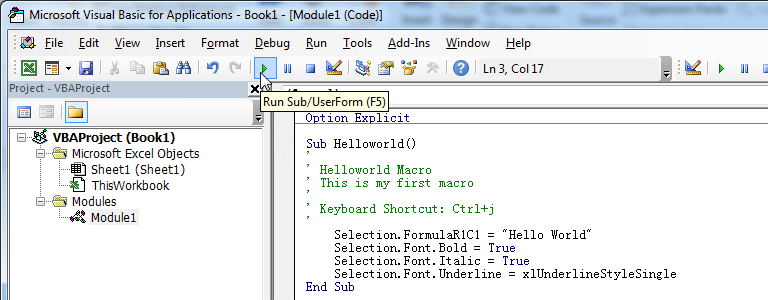
- Click Run button on the Visual Basic Editor toolbar.

- For more information, learn this course: Programming with Excel VBA